

Getting new gutters installed is one of the smartest investments you can make in your home’s exterior. Proper water drainage protects your foundation, prevents soil erosion, and keeps your basement dry. But the success of any gutter installation project depends heavily on how well you prepare before the crew arrives.
Most homeowners focus entirely on choosing the right contractor and forget that their own preparation work matters just as much. A cluttered work area, damaged fascia boards, or unresolved permit questions can slow down the job, increase costs, and create headaches for everyone involved. Taking a few hours to get your home ready makes the entire process smoother and faster.
This guide walks you through every step of preparation, from inspecting your roofline to coordinating with your installer on the day of the job. If you’re still in the planning phase and want to understand what the full installation process looks like from start to finish, that context will help you follow along with everything covered here.
Assess Your Home and Plan the Installation
Before any physical prep work begins, you need a clear picture of your home’s current condition and what the new gutter system will require. Skipping this step leads to surprises mid-project that cost time and money.
Inspect roofline, fascia, and soffits for damage
Walk the full perimeter of your home and look up at the roofline carefully. You’re checking for sagging sections, rotted wood, peeling paint, and any areas where the fascia board has pulled away from the structure.
Damaged fascia is one of the most common reasons gutter installations get delayed. If the mounting surface isn’t solid, gutter hangers won’t hold properly, and the entire system can fail within a season. Soffits should also be checked for moisture damage, pest intrusion, or cracks that could worsen once new gutters redirect water flow.
Look at the roof overhang as well. The edge of your roof needs to sit correctly above the gutter channel so rainwater flows in rather than behind the system. Note any areas where shingles are curling or missing, since those spots will affect how water enters the gutter.
Evaluate drainage needs and downspout locations
Think about where water currently pools around your home after heavy rain. Those low spots tell you exactly where your drainage system is failing and where downspouts need to be positioned.
Downspouts should discharge water at least four to six feet away from your foundation. Foundation protection depends entirely on proper placement, so this isn’t a detail to leave entirely to the installer without your input. Walk your yard and identify any existing drainage paths, buried utilities, or garden beds that could affect where downspouts can realistically go.
Consider gutter slope as well. A proper gutter pitch of roughly a quarter inch per ten feet ensures water moves toward the downspout rather than sitting and overflowing. Your installer will handle the technical measurements, but understanding the concept helps you have a more informed conversation.
Confirm gutter style, materials, and contractor details
Use this table to compare the most common gutter materials before finalizing your choice:
| Material | Durability | Cost Level | Best For |
|---|---|---|---|
| Aluminum Gutters | High | Moderate | Most climates |
| Vinyl Gutters | Moderate | Low | Mild climates |
| Seamless Gutters | Very High | Moderate-High | Leak prevention |
| Steel Gutters | Very High | High | Harsh weather |
Seamless gutters are the most popular choice for homeowners who want minimal maintenance and fewer leak points. Aluminum gutters offer a strong balance of durability and affordability for most residential applications.
Confirm your contractor’s license, insurance, and warranty terms before the project begins. If you haven’t finalized your hiring decision yet, reviewing the right questions to ask before hiring a gutter installer can save you from costly mistakes down the road.
Clear and Protect the Work Area
A clean, accessible work area isn’t just courteous to your installer. It directly affects how efficiently the job gets done and how safely the crew can operate around your property.
Move vehicles and outdoor furniture away from the house
Park all vehicles on the street or at least thirty feet from the house on installation day. Installers work with long sections of gutter material, ladders, and power tools, and a car parked close to the home creates a real obstacle and a liability risk.
Patio furniture, grills, planters, and decorative items along the home exterior should all be relocated the evening before. This includes anything stored under eaves or against exterior walls. The crew needs unobstructed movement along every side of the house.
Don’t assume the installer will move things for you. Most contractors will ask you to clear the area as a condition of the job, and arriving to a cluttered site can delay the start time or result in additional charges.
Remove obstacles along exterior walls and walkways
Check every walkway that runs alongside your home. Garden hoses, extension cords, potted plants, and decorative edging all become tripping hazards when workers are carrying materials and climbing ladders repeatedly throughout the day.
Debris removal from the immediate work zone is your responsibility as the homeowner. Clear any mulch piles, stacked firewood, or seasonal items stored against the house. The cleaner the path, the faster and safer the installation proceeds.
Also check for any low-hanging branches that extend over the roofline or along the fascia. Branches that interfere with ladder placement or gutter runs should be trimmed before the crew arrives.
Protect landscaping, utilities, and outdoor equipment
Gutter installation involves old hardware removal, drilling, and sometimes debris falling from the roofline. Delicate plants, flower beds, and shrubs directly below the work area can take damage if left unprotected.
Lay down drop cloths or old tarps over garden beds running along the foundation. Move potted plants entirely out of the work zone. If you have an irrigation system with above-ground components or outdoor lighting fixtures near the roofline, flag them clearly so the crew knows to work around them.
Locate your utility shutoffs before the job starts. Knowing where your outdoor electrical outlets and water lines run prevents accidental damage during ladder placement and anchor drilling.
Prepare Existing Gutters, Roof Edge, and Access
If your home already has gutters, the old system needs to be addressed before new installation begins. This phase also covers the structural repairs that create a solid foundation for the new system.
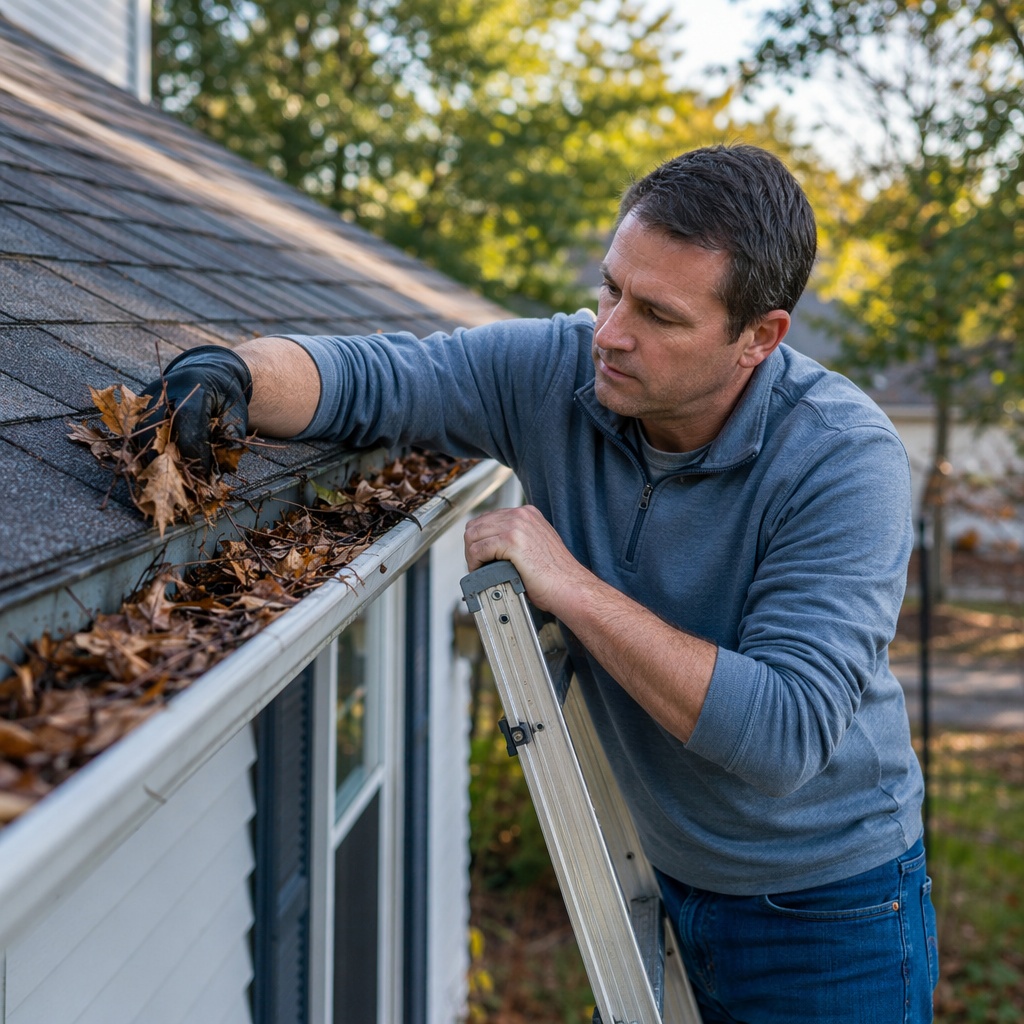
Safely remove or secure old gutters and hardware
Some contractors include old gutter removal in their quote, while others charge separately or expect the homeowner to handle it. Clarify this before the project starts so there are no surprises on installation day.
If you’re removing gutters yourself, ladder safety is non-negotiable. Use a stable, properly rated ladder with a standoff to keep it away from the fascia. Work with a partner who can stabilize the base and help manage the weight of removed sections.
Old gutter brackets, screws, and hangers left in the fascia board need to be fully removed or properly set before new gutter hangers go in. Leftover hardware creates uneven mounting surfaces and weakens the new installation.
Repair fascia, soffits, and trim for a solid mounting surface
Any rot, soft spots, or water damage in the fascia board must be repaired before new gutters go up. Gutter brackets and hangers anchor directly into this wood, and a compromised surface means the system won’t hold under the weight of water and debris.
Replace rotted sections with pressure-treated lumber or a composite material rated for exterior use. Prime and paint the new wood to match the existing trim and to protect it from future moisture exposure. This is also a good time to address any weatherproofing gaps around trim joints and corners.
Soffits that show signs of moisture damage or pest activity should be repaired at the same time. Addressing both surfaces together prevents you from having to remove new gutters later just to fix underlying structural issues.
Plan safe access for ladders, scaffolding, and work paths
For single-story homes, standard extension ladders are typically sufficient. For taller structures, if you’re curious about specific equipment and timing considerations, reviewing details about gutter options and installation factors for two-story homes gives useful context on what professional crews typically require.
Clear a path from the street or driveway to each side of the house. Installers need to transport long gutter sections, and tight gates, low fences, or locked side yards can block access entirely. Unlock gates the morning of the job and prop them open if needed.
Mark any underground utilities, irrigation lines, or buried cables near the foundation. Ladder feet placed on unmarked lines can cause damage that becomes a separate repair bill.
Coordinate with Your Installer and Final Checks
The day before installation, run through a final coordination checklist with your contractor. Clear communication at this stage prevents the most common day-of problems.
Review layout, downspout placement, and water discharge
Walk the property with your installer or review the layout plan they’ve provided. Confirm that every downspout location makes sense for your yard’s drainage patterns and that water discharge points won’t direct flow toward your foundation or a neighbor’s property.
Discuss gutter slope and pitch adjustments for any sections of the roofline that present challenges. Rainwater management depends on getting these angles right, and a quick walkthrough conversation is far easier than fixing a poorly pitched run after installation is complete.
Ask about gutter guards if you haven’t already decided. Homes surrounded by heavy tree cover benefit significantly from leaf protection systems, and adding guards during initial installation is always more cost-effective than retrofitting them later.
Confirm permits, HOA rules, and property protection
Some municipalities require permits for gutter installation, particularly when significant structural repairs are involved. Your contractor should handle permit pulling, but confirm this is included in the scope of work.
If your home is in a community with an HOA, check the guidelines for approved gutter materials, colors, and downspout placement. Violations can result in fines or mandatory removal, so getting approval in writing beforehand protects you. Home inspection records can also be useful here if your HOA requires documentation of existing conditions.
Ask your contractor how they plan to protect your driveway, siding, and landscaping during the job. Professional crews should use drop cloths and take care around finished surfaces, but setting this expectation explicitly avoids misunderstandings.
Prepare your household for installation day
Let everyone in the household know what to expect. Installation involves noise, ladder movement around the exterior, and periodic interruptions if workers need access to a hose bib or electrical outlet.
Keep pets indoors throughout the workday. Loose dogs create safety hazards for workers on ladders, and the noise and activity can cause stress for animals. Secure any pet doors that open to the work area.
Plan for the job to take most of the day. Knowing how long gutter installation typically takes helps you set realistic expectations and arrange your schedule accordingly so you’re available if the crew has questions.
Conclusion
Preparing your home properly before gutter installation is straightforward work that pays off in a faster, cleaner, and more durable result. Inspect your fascia and soffits, clear the work area, address any structural repairs, and communicate clearly with your installer before the job begins.
The homeowners who get the best outcomes are the ones who treat preparation as part of the project, not an afterthought. A little effort before the crew arrives means fewer delays, fewer surprises, and a gutter system that performs exactly as it should for years to come.
FAQ
Do I need to be home during gutter installation?
You don’t need to be present the entire time, but being available at the start and end of the job is strongly recommended. The crew may have questions about access, downspout placement, or unexpected conditions they discover during the work. Being reachable by phone throughout the day is the minimum expectation.
Should I repair fascia and soffits before or after scheduling the installer?
Assess the condition of your fascia and soffits before scheduling, but you don’t necessarily need repairs completed first. Many gutter contractors can handle minor fascia repairs as part of the project scope. For significant structural damage, completing repairs beforehand ensures the installer can begin gutter work immediately without delays.
How can I protect my landscaping and exterior surfaces during the project?
Cover garden beds and delicate plants with drop cloths or tarps before the crew arrives. Move potted plants and outdoor décor completely out of the work zone. Ask your contractor specifically how they protect driveways and siding from debris and tool damage, and confirm their cleanup process for removed hardware and old gutter sections.